
Post by Jean B. on Apr 21, 2022 10:42:59 GMT -5
SEPTEMBER 2016
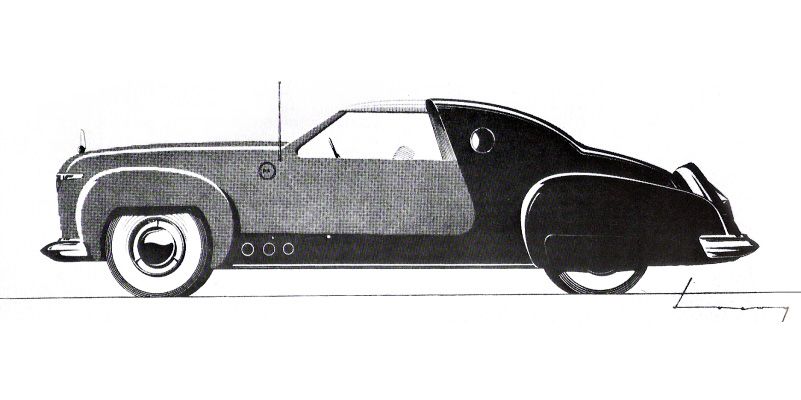
Hi mates, I'm back! Did you miss me? I missed you, so I followed your posts on S1/43 during my fantastic summer vacation in the North Sea. Unfortunately, summer is over now, and it's time to wipe away the cobwebs around the work bench. This time, as you've already seen, I'm "visiting" the USA again and will convert the Lincoln Continental Derham Coupé, designed by industrial design artist Raymond Loewy and made by Brooklin. (Century made the same model, I suppose in the same cast, but with some differring details.) Loewy designed plenty of cars, with more or less success. His designs on the Jaguar E-Type or the BMW 507 are - hopefully - the worst in automotive history ever! This Lincoln is not the big shot, especially the dull front grille, but nevertheless quite handsome in its attitude. A kind fellow on coachbuild.com helped me in identifying the car, as there were two cars built for Loewy, one in 1941 and a second one in 1946. As I am only collecting cars made before WWII (for the US that means before 1942), I want to make the first version, although the Brooklin model shows the later one.
Loewy's (first?) sketch:
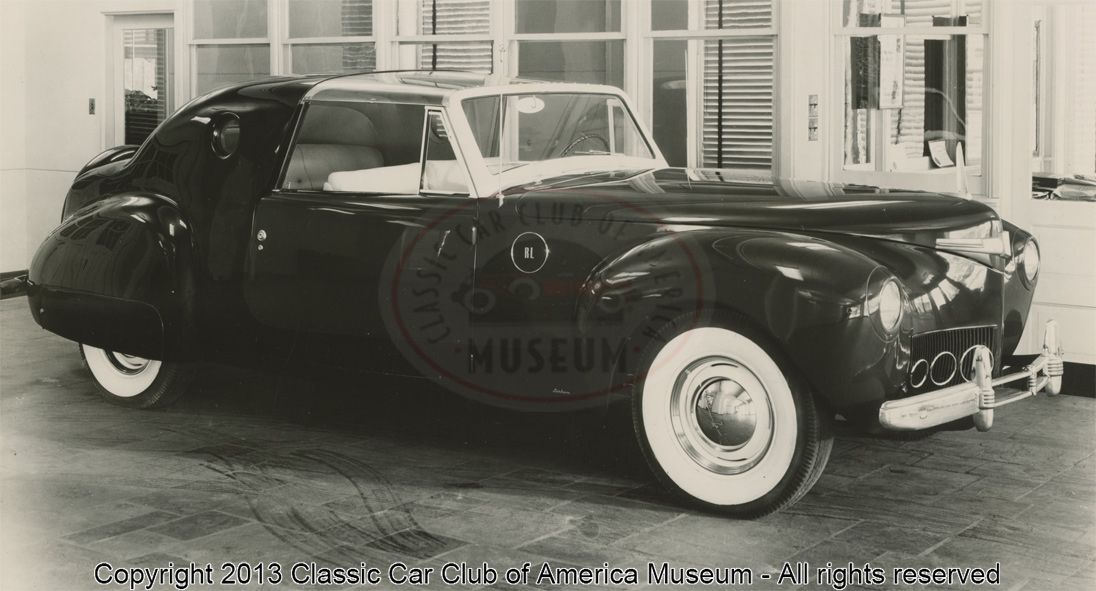
The car from 1941:
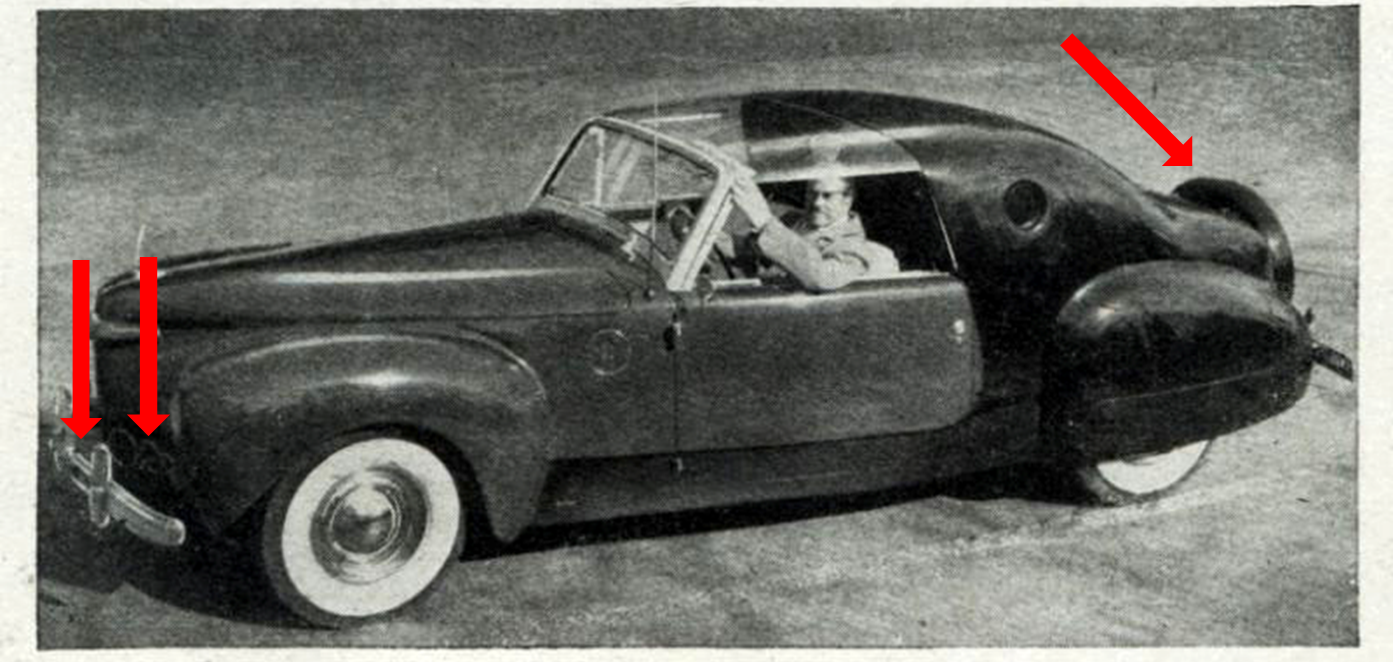
And the differences compared to the 1946 version:
 (1941 standard bumpers, grille with 2 x 3 rings, continental spare wheel, painting described as brown and black)
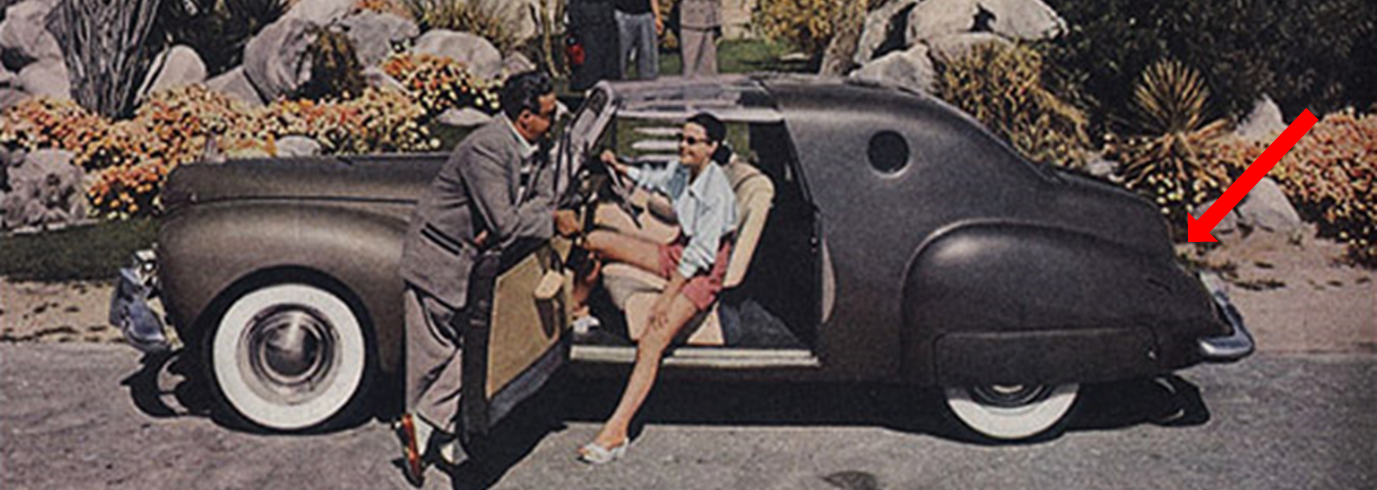 (1946: bigger bumpers, no spare wheel, but a central fin (not to be seen on the photo due to the photographic angle/distortion), grille with a central ornament, painting in bronze/gun metal metallic)
And the model by Brooklin:
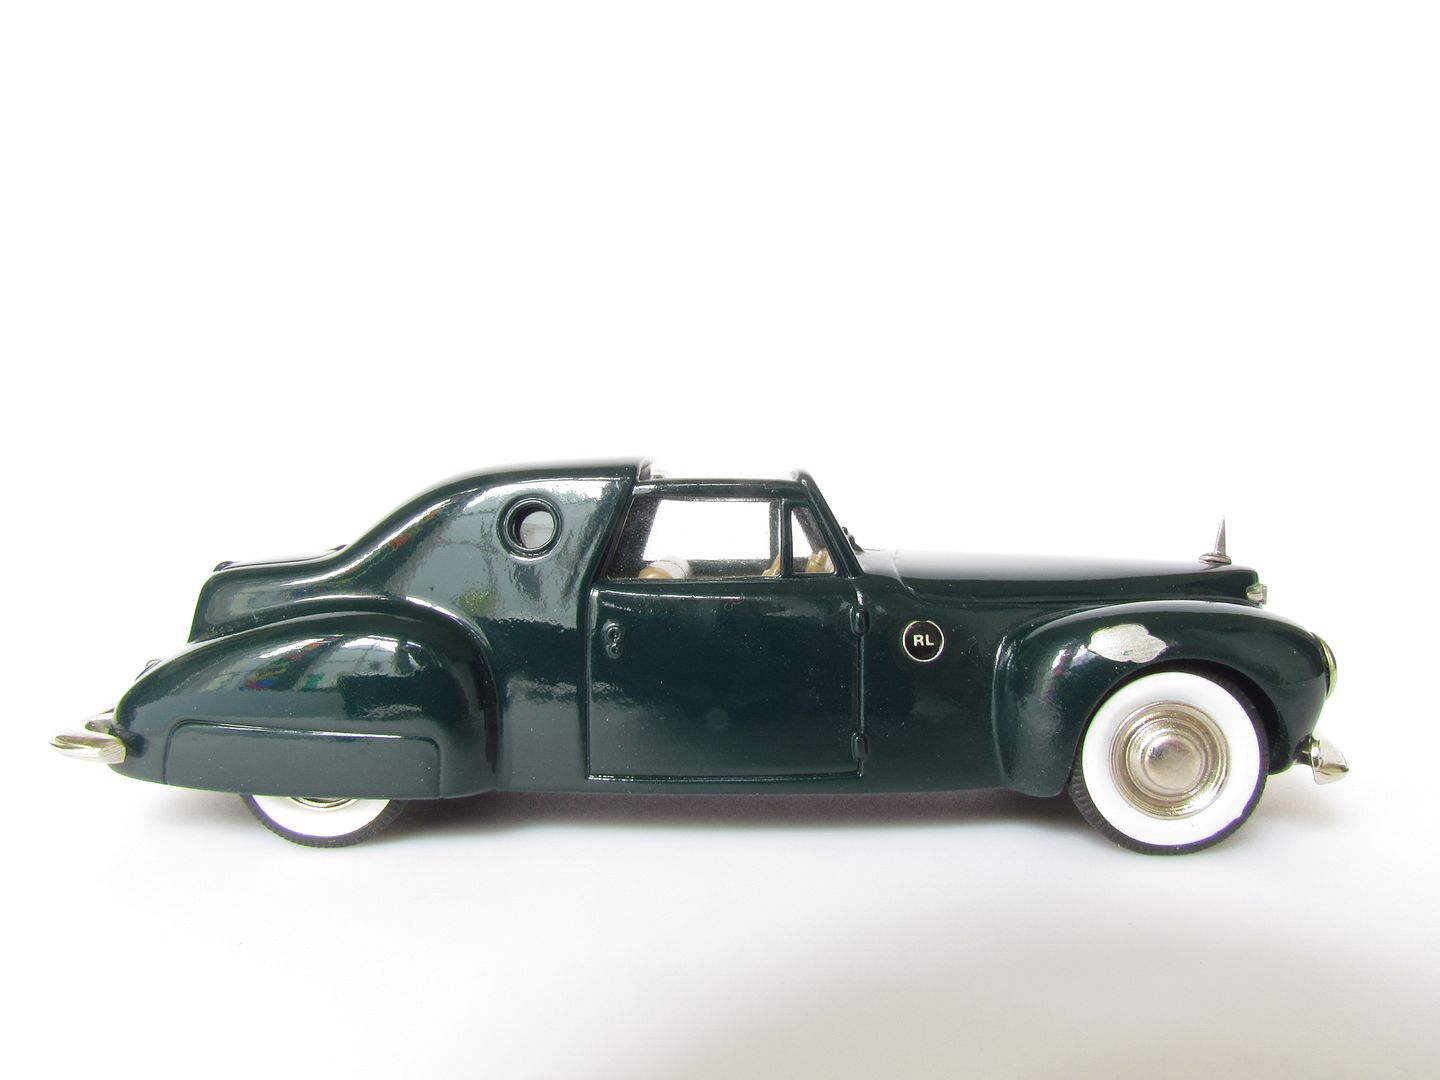 Model shows the car in its current condition
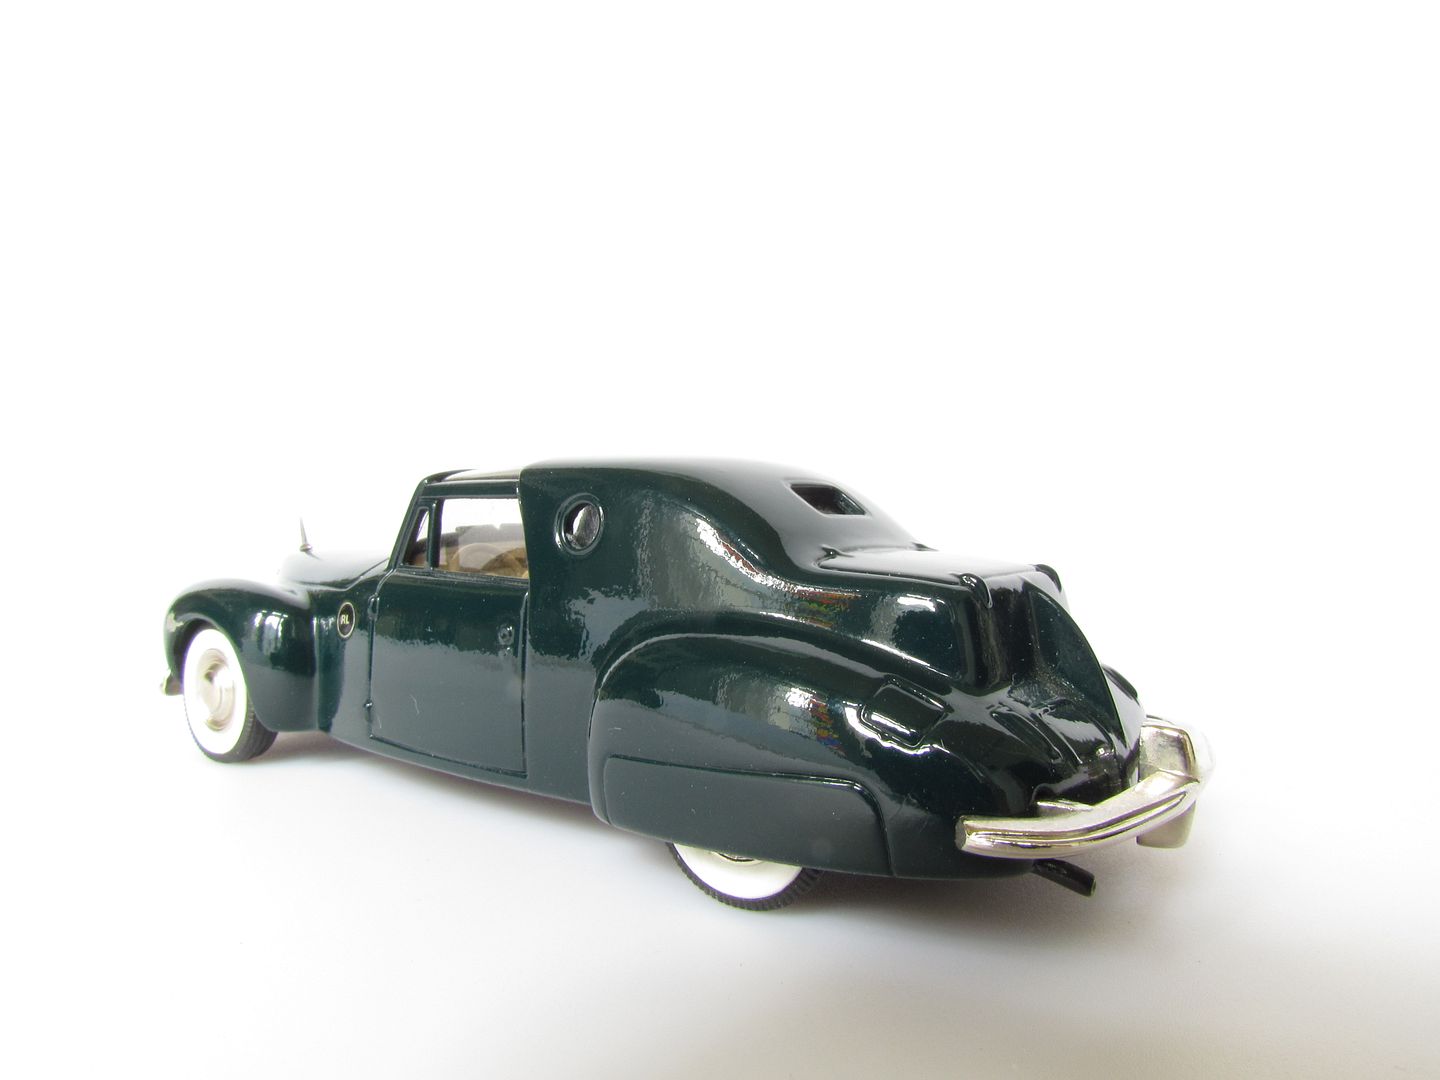
 Authentic plexiglass roof, but with awful thick bars!
 Limited collector's edition
This as an introduction, and I'd be glad to inviting you to this thread, if you like ! Stay tuned!
Loewy's (first?) sketch:

The car from 1941:

And the differences compared to the 1946 version:
 (1941 standard bumpers, grille with 2 x 3 rings, continental spare wheel, painting described as brown and black)
 (1946: bigger bumpers, no spare wheel, but a central fin (not to be seen on the photo due to the photographic angle/distortion), grille with a central ornament, painting in bronze/gun metal metallic)
And the model by Brooklin:
 Model shows the car in its current condition
 Authentic plexiglass roof, but with awful thick bars!
 Limited collector's edition
This as an introduction, and I'd be glad to inviting you to this thread, if you like
 ! Stay tuned!
At least there is enough that needs improvement...
Easiest way to bring this model up to spec. is melt it down and re-mold it!
I found it the biggest difficulty to get the matching bumpers for the '41 version, so I first bought the Altaya Continental, being aware that all Ixo/Altaya models are much too fat! After confirming this, I bought the Minichamps Continental, learning that this seems to be rather 1/64 than 1/43:


So if anybody is in need of one of these Continentals, please let me know! They are new with original boxes. (Seems as if I would have to make the bumpers by myself, was an expensive plan to copy the bumpers elsewhere... :? )
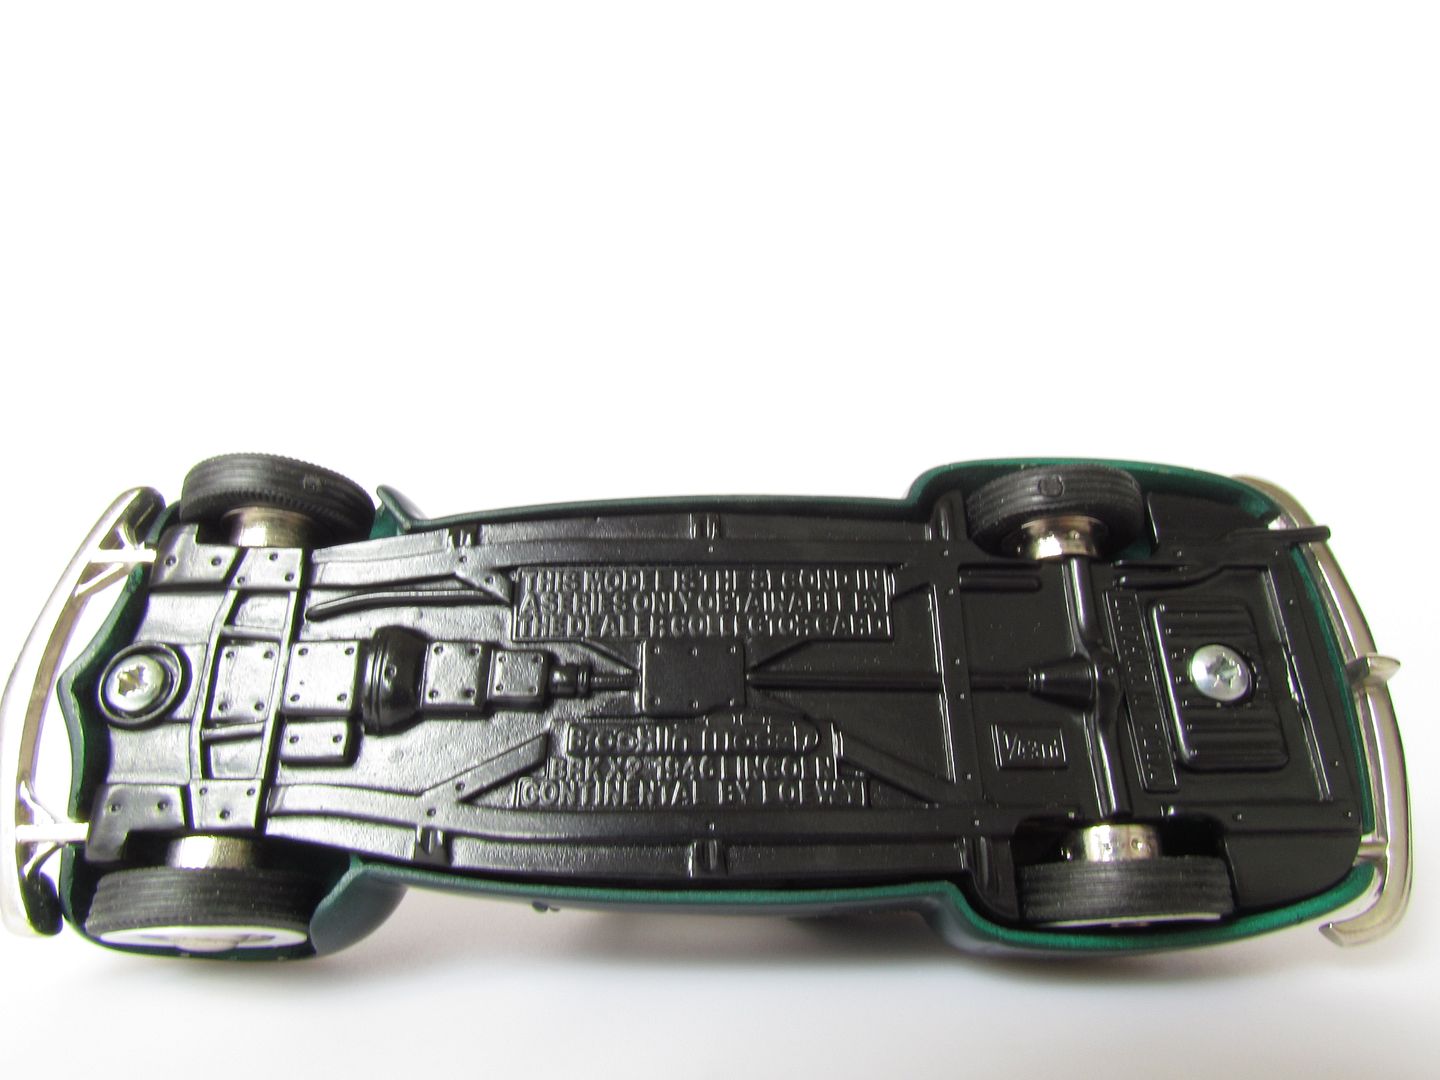
Time to disassemble:

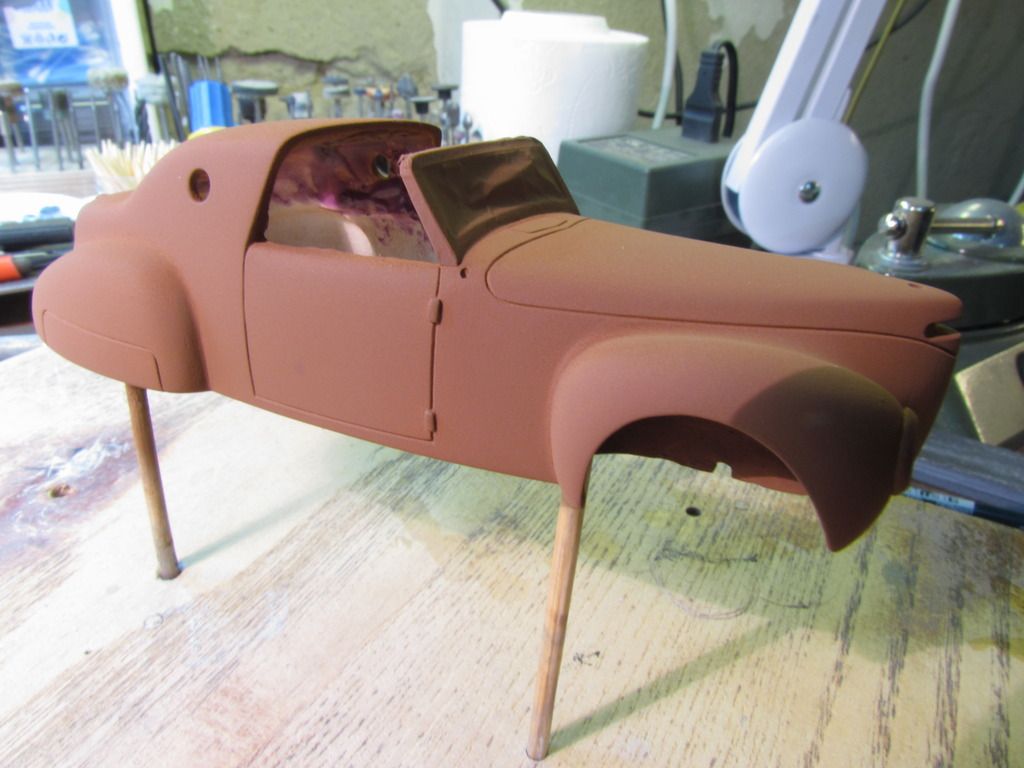
... and to strip off the painting:

Always funny to see how nice the model cars are detailed under the finger-thick paintings:

As I always say: Acetone is not only a very tasteful and refreshing longdrink :mrgreen: , it further reveals the essence of an artwork, where dullness hazed your eyes.
Going on: The central tail-fin is nice, but has to be replaced with a spare wheel for the '41 Conti. Cutting it off is an easy operation:
 (the future spare wheel cover in front)
Tadaa:

A simple printout helps designing the cutout:

Don't forget to fill up white-metal from the underside for not milling through the bodywork :oops: :


Tail-lights and much-too-big cutouts for the bumper were also deleted:

Great subject and like everyone else here I'm looking forward to seeing the finished result. I'd love a decent model of this car myself but don't have your modelling skills so I'll just keep my fingers crossed for an announcement from Matrix/Kess/Esval.
Don't know why, but I think that almost any model car has too big trackwidth, especially old cars...
 Look at the strange "fat" inner sides of the wheels :?
 Brooklin challenges with pressed-into wheels and axles which can't be solved with any "soft" technique, so it's necessary to cut the axles midway and shorten them slightly to make a narrower track:

Fixed in the Dremel and reduce the inner sides:

Shorten the axles and connect them with a brass tube:

Provide some space in the baseplate for this tube:

Already burnished and brought into place:

Ingenious way to solve the track problem. Great work so far!
Looking good!

Now a more delicate labour follows. As already shown, I bought two Continentals for the purpose of "borrowing" the bumpers, but the Altaya was much too wide, the Minichamps much too narrow. So nothing helps, I have to make it on my own... :roll: First grabbing flat and half-round brass strips, bringing them into shape and soldering the central "V" together:
 (two half-rounds soldered one on the other for the side parts; the flat strip filed to "sharp" edges, cut at an angle and soldered together)
The side parts bent on the corners and cut to length; making a simple template for the angle and arrangement:

All parts soldered together:

...polished (before soldering!) and nickle-plated:

Rear bumper doesn't need the double-bladed center part (thanks god!!!):

...bent...:

...shaped and plated:

(The attentive reader noticed that these works were already made some time ago, before the bodywork was overdone... :oops: )
Those bumpers look great!
Looking nice! 
Just before reading this sentence I was thinking to myself: Jean is making 2 models at the same time! "This is the second one without cutting and filling works".. :lol: Superb, as always...
A bit of gold trim. Am very much looking forward to seeing how your Loewy Lincoln turns out.
Lovely work as always Jean. I learn something new every time I come to one of your posts.
 I would make some video clips, but I'm not familiar with that modern techniques, so I will maintain with photographing... :oops:
 Holders for bumpers were made of brass strip and then burnished. And I learnt that such thick brass has to be annealed before bending it - well, learning by doing!


Headlights are glued into bodywork...

... to be milled out, so that only the frame stays in position, as it will be painted together with the body:

polished:

Jean, I hope you are going to replace the windscreen wipers! Or indeed the whole frame.
Your headlights will make a huge difference.
 Although I was a little bit afraid because the Brooklin headlights were made quite refined...
fantastic work! each and every time i see what you are doing to the models i am stunned....
I posted a Lincoln thread? That's interesting. :? Will have to find and remind myself of it.
Today - Day of the German Reunion! - I've made only minor works: Deleting the roof bars and the side vents:

Will be difficult to make the plexiglass roof detachable, the side vents will be made with photo-etched frames (as well as the windshield frame and the wipers).
So this is what the finished car will look like Jean ? Should the rear edge of the front wings have more curvature (note how they curve back under the vertical line at the bottom) ?
...Original condition:

Applying solder from behind to have "stuff" to shape:

Reshaped front wing (the rear top edge has also been rounded):

At this opportunity I noticed that the opera windows are much too big and "mis-located", so I deleted them:

Printing a photo in the matching scale helps positioning the window:


To be continued...
I'd noticed the position of the window, looks correct now. Small changes, lots of work...
Looking good Jean. I think it was worth the effort to make these small corrections before you finished the model.
Opera windows are now ready on both sides, and the window frame has been "straightened & cleaned":

And I fear that I will be absent for a few days, from time to time I unfortunately have to earn some money for buying new models...

Finally I'm back at my workbench, I really have withdrawal symptoms :mrgreen:
Meanwhile Brooklin supplied another axle resp. wheels - they really have a perfect service for ordering single parts . This 5th wheel is necessary for making the spare wheel:

Dividing the axle and milling out the spare wheel cover from behind:

Reducing the material on the back of the wheel and opening up the hole in the trunk:

Fits!

Meanwhile Brooklin supplied another axle resp. wheels - they really have a perfect service for ordering single parts
. This 5th wheel is necessary for making the spare wheel:
Dividing the axle and milling out the spare wheel cover from behind:

Reducing the material on the back of the wheel and opening up the hole in the trunk:

Fits!

@ Tom & Jager: Thank you! It's still a little bit tricky to make round parts only with the motor device, not with a lathe. But I'm still not sure if I should buy one and which one in this case... :?
Meanwhile I have designed the photo-etched parts and really do hope that I've not forgotten anything and that everything will fit:

Meanwhile I have designed the photo-etched parts and really do hope that I've not forgotten anything and that everything will fit:

Looks great to me. I appreciate the problem associated with making the parts before you get to using them, it requires a lot of planning, thinking ahead and relying your experience with past builds.
I've bought a lightened drawing board, it's really useful for works like this, arranging the four transparent foils for the film pocket for photo-etching:


ozmac: :shock: Hope that I'm not affected... but it seems that it works now as usual again...
Nice... 30 years ago I didn't know at all that I would do such things once in a time...
To be honest: I don't, neither... :roll: Obviously Mr Loewy had a faible for circles, so I was quite dazzled about all the rings and circles on the film and was finally not sure if I combined everything in the right way... :oops:
Photo-etching turned out quite well, only few very tiny parts have gone lost due to holding rods which were too thin... But these parts are only needed for the final finishing, and by that time I'm sure I'll already make the next turn of etching :

The dashboard in its original layout:

...and "cleaned" for the photo-etched parts (the loudspeaker already in position):

:shock: Hope that I'm not affected... but it seems that it works now as usual again...Reminds me of my job as a repro camera operator 30 years ago...
I have no idea what half of these parts are for, but look forward to seeing how they all fit into place.
Photo-etching turned out quite well, only few very tiny parts have gone lost due to holding rods which were too thin... But these parts are only needed for the final finishing, and by that time I'm sure I'll already make the next turn of etching
:
The dashboard in its original layout:

...and "cleaned" for the photo-etched parts (the loudspeaker already in position):

Love the speaker grill, the artistry is in not being satisfied with the existing piece and thinking how you can improve on it. The result is a great improvement indeed.
Hi Jean, just came back from my three weeks fall break on Norderney and saw your newest thread. Amazing skills and diligence as always. I never thought you would work on a model of a FoMoCo product... 
And yes, I'm doing a "FoMoCo" product, simply for not anyone thinking that I'm posh... :oops: And to show that "sh... happens", I want to show following problem:
The frame for the flat windscreen is flat at its top edge, but was curved to the front at its lower edge. When filing this curvature down, the material got so thin that it was torn off:

Quickly designed a matching frame and photo-etched it:


"Cleaning" the existing frame:

Glueing the new frame onto:

Smoothing everything with putty:

... and already (finally...
) priming all parts:
Thanks for your encouraging comments!
After sanding and a second coating with primer the body looks like this:

The interior decoration elements are now gilded:

The two main gauges are ready made:

And the wheels got a cream-white ring (at least I suppose that it should be a similar colour):

After sanding and a second coating with primer the body looks like this:

The interior decoration elements are now gilded:

The two main gauges are ready made:

And the wheels got a cream-white ring (at least I suppose that it should be a similar colour):

Fantastic details!
Working magic!
Thats nuts. You have missed your calling. You should be doing this for a living.
Meanwhile I'm doing things that my camera seems to be unable to reproduce. There are tiny "Lincoln Zephyr" writings on the hubcaps (according to the photo on page 1), which are furthermore glossy lacquered now, but the reflections make it impossible to see...

The steering wheel has thin dark red rims around, this is to be seen at the '46 model in its current condition, but I think it's suitable for the '41 as well:

And the interior as well as the windscreen frame got the first cream-white painting:

HELP AGAIN!!! Since yesterday photobucket seems to be unavailable... Can you upload photos to photobucket? By the way, is there an alternative for uploading photos?
Seems that some unpolite curses are sometimes helpful, photobucket now accepts my photos...
I regard this doing as a kind of late education, always trying to get closer to the desired result... On the other hand, believe me, it's also frustrating to fail in 50 %... 
Meanwhile:
Yesterday I got my new airbrush, made by Harder & Steenbeck It's great!!!

And here's the result of the first testing with the brown painting for the Lincoln:
And the completely assembled wheels:

Always a pleasure to see you do the small bits that make the end result such a masterpiece.
Meanwhile:
Yesterday I got my new airbrush, made by Harder & Steenbeck
It's great!!! 
And here's the result of the first testing with the brown painting for the Lincoln:

And the completely assembled wheels:

I've long since given up on the bucket. The best alternative IMO is flickr.com where you get a free terabyte of storage.
What do you do with images stored on PB?
Wheels look fantastic. Looking forward to the final layer of paint...
I assumed from Jean's earlier posts on page one it will be painted as described ("brown and black")

The next two days the black paint will follow, cross your fingers that everything will work... :roll:
And the interior including the dashboard is going on, slowly...

Jean, The dash looks fantastic but am most impressed with the light, airy look of the steering wheel.
Small tutorial for masking and two-tone-painting:
First design the desired shape on screen and print out in the right size:

Stick with double-sided tape onto 0.5mm polystyrol card, cut out (with knife) and smoothen & shape the edges:


Put onto Bare Metal Foil and cut out the template:

Stick BMF onto body, rub on the edges very carefully but very tightly:

Airbrush second colour:

And here another photo of the interior, unfortunately still missing one of the small gauges...:

And the two RL-Logos (they say the rings of the original logos were taken from one of Raymond Loewys fridges... :lol: ):

...thank you!
Well, I think I've made my day, the result of the three-tone painting turned out quite good:


There are some smaller blemishes, but that's nothing I'm afraid of... Nevertheless I have to wait 24 h until the painting has dried completely to retouch the concerning spots. Enjoy your sunday!
Well, I think I've made my day
, the result of the three-tone painting turned out quite good:There are some smaller blemishes, but that's nothing I'm afraid of... Nevertheless I have to wait 24 h until the painting has dried completely to retouch the concerning spots. Enjoy your sunday!
Fantastic masking technique and result, thanks for sharing!
Meanwhile two layers of clear lacquer have been applied, and I think it already looks quite well...:

Tomorrow I will start polishing and then I will decide if a third layer is necessary or not.
Furthermore the windows are cut out of glass and glued into their frames:

...thanks, guys, but please wait until the Loewy Lincoln is ready...
As announced I spent my day polishing the Lincoln, and I am quite satisfied with the result. On the photos it still looks quite terrible due to the bright halogen and LED lights, but believe me, in real life the painting has a deep lustre and a shiny surface. I think it will turn out on the photos the right way when I take photos with natural light...

The portholes, sorry: the opera windows got their light blue glass:

The spare wheel has already found its place:

As announced I spent my day polishing the Lincoln, and I am quite satisfied with the result. On the photos it still looks quite terrible due to the bright halogen and LED lights, but believe me, in real life the painting has a deep lustre and a shiny surface. I think it will turn out on the photos the right way when I take photos with natural light...
The portholes, sorry: the opera windows got their light blue glass:
The spare wheel has already found its place:
Nice! Love all the small details like the blue glass.
Brooklyn would have never dreamt about this quality Lincoln... Glad you share all the process with us, the drools keep dripping.
And if you are teased with all this, I've reached my goal :lol: Beside several smaller retouches, I finally "married" body and chassis, so we now have a first look at the completed car:


The dust drives me crazy... :evil:
A very striking model. Great job as usual, looking forward to the 'studio'pictures.
Hard to believe, but I spent almost the whole day with arranging the radiator grille. First I covered black Bare Metal Foil with AlClad Clear Flat Kote to get a thin matte black adhesive foil. Cut out with the help of the photo-etched radiator grille and sticked in the right position:

Then the metal grille had to be curved fitting the bodywork. Not so easy, as there are two different radii at top and lower edge. Fixing the grille was difficult, too, as usual adhesive would get into the thin rods, so I chose adhesive spray, but this doesn't stick very tightly...

Finally the chrome bars on upper door edge and roof, the door buttons and the RL-logo were applied:

...and the shark has
pretty teeth, dear,
and he shows'em
pearly white...

From photo-etched headlight "lenses" I made a silicone cast, as well as from the licence plate. The clear resin was filled with white pigments for the licence plate, afterwards sprayed black and then filed the reliefed numbers. This way you can make reliefed licence plates with coloured figures (depending on the pigments you are using):

Lego bricks always are useful as third, fourth and fifth hand:

Making the bumper horns from rectangle brass strip:


Lego bricks always are useful as third, fourth and fifth hand:
Making the bumper horns from rectangle brass strip:
Those overriders look great! Love your technique for making plates and lenses, have you devised that yourself?
! Well, at least I cannot say that I have seen these techniques anywhere before... Perhaps I should claim a patent for that... Again, top workmanship to produce a stunning model with great details. 

By the way, I couldn't resist to make the small red "barber shop" stripes for the overriders:

From the hardened remainings of the clear red resin I needed for the taillights, I made the funny-styled central taillight:
 (hope the entire beauty will be visible when clear-coated...)
And - tadaaa - the plexiglass roof, carved from light blue plexiglass, matching the opera windows:

What an amazing end result. Another creation to be proud of and another model nobody else has. And the satisfaction that it's all your own work.
! And indeed, everytime I'm ready with a car, I can't believe that I have done it by myself, that's a really good feeling Stunning results! So nice, in fact, that it even made me consider what I originally thought about the 1:1... :shock:
So nice, in fact, that it even made me consider what I originally thought about the 1:1... :shock:Another exclusive, stunning model, Jean - that's your standard performance That beautiful Chrysler reveals that you have private projects you don't share with us - shame on you
That beautiful Chrysler reveals that you have private projects you don't share with us - shame on you Wonderful
Meanwhile you know me quite well, and so you can be sure that I'm already working with the next kit. And if you thought that the Lincoln already was a "folksy" car, hold tight for my next project, this will lead us down to the frugal base of motorizing...
Looking forward to that!
The Chrysler is one of your older efforts but was still only 18 months or so ago. It's nice but could really do with some of your trademark etching upgrades, especially the windscreen surrounds.
It's nice but could really do with some of your trademark etching upgrades, especially the windscreen surrounds. I must say you showed me that white metal may have future in scale world. For me it was a hopeless model making technique since the resin times, but your craftsmanship raises this to another level of model perfection!
Meanwhile the Lincoln moved to its new home:

Some home is that!
Gorgeous showcases, Jean! I think I spot a WM Auburn and an upgraded Rio Cadillac - what's the car right of the blue Caddy?
Resembles a 1930s Packard Victoria, but I don't know any in 1/43...(except one in resin :? )Always curious to see your postings!
Resembles a 1930s Packard Victoria, but I don't know any in 1/43...(except one in resin :? )Always curious to see your postings!
RIO is right, the Auburn is the one by Matchbox. When starting with model building, I first took the (cheap :oops: ) Matchbox cars, but the proportions of the Matchbox Auburn are horrifying! So I meanwhile bought the WM as well... The Packard is also by Matchbox, I think this was the second or third car I built, still without any of the techniques I use now, only the plain car "smoothened" and repainted:
I believe it is called "Total Art Work"! And yes, you're certainly achieving it!
Sorry, I couldn't resist boasting :oops:
this is art in it's purest form...amazing result.
And now one last picture. Not the best result, but a first attempt in rear projection. I equipped my newly built photo-box with a rear wall of translucent plexiglass to project any pictures on it from behind. Of course I'll need spotlights from the front to illuminate the model car, but I think it's going in the desired direction:

