
Post by Jean B. on Apr 23, 2022 4:59:41 GMT -5
JANUARY 2016
This thread has been transferred from S1/43. Due to technical reasons possibly not all comments of members are visible. I'd like to apology for this. The photos, hosted by photobucket, will be deleted in near future. They will be replaced by new versions from flickr, but this will take some time. For any questions, please contact Jean B. Thank you!
The sun is shining, a mild atlantic breeze gives an impression of spring, and this mood requires an appropriate car for the forthcoming season! I've decided to take the Austro Daimler "Bergmeister", the name implies a curvy ride over sunny serpentines in the Austrian Alps.
This is the model how it arrived last christmas from Australia (yes, not Austria!):

Meanwhile without all the details like marker lights, fuel cap, door hinges and so on:

The rear axle sat a little bit too high, so it needed a spacer of 0.5mm, which I made by photo-etching:


Equipped with front and rear axles and a kind of propeller shaft:

The according transmission tunnel on top of the base plate, ready for priming:

Made the radiator grille today. Actually it's not time for this, but I was so curios how it would work out...
The original radiator, already free from the thin diagonal rod which should resemble the "Bergmeister" writing:

painted black, the mascot cut-off, the AD-logo honed off:

...and equipped with the photo-etched radiator grille, the new "Bergmeister"-writing and a new logo:

Unfortunately it is not to be seen on the photo that you have a kind of "3D-effect" as the grille mask is placed a millimeter over the grille, so you can look through the thin rods. Above you can see the old massive hood ornament and the new photo-etched one.
@steve:
Here's another picture of the grille:

The real car shows a writing with amazing Art-Déco letters, but this had required designing a completely new font, and I felt not able to do this

All parts ready for priming:

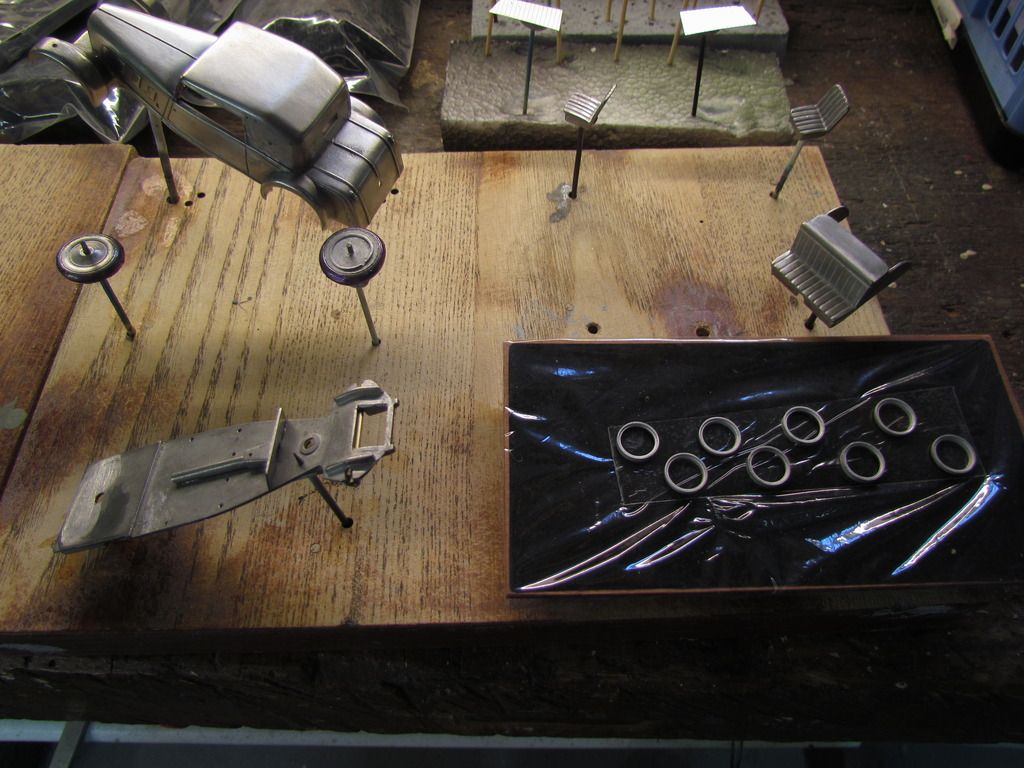
... and done so:


Here's another picture of the grille:

The real car shows a writing with amazing Art-Déco letters, but this had required designing a completely new font, and I felt not able to do this


All parts ready for priming:


... and done so:


Tom: That's a very kind and tempting offer, thank you! Anyway: As I've already fixed the writing I think I won't change anything with the grille anymore... Furthermore I simply do not have a high-res photo. But I'm sure I'll contact you another time, whimpering and begging for help :oops:
Today's results:
The base-plate is almost finished, matte-black rubbed with graphite powder, exhaust pipe with new ending (I always need real tubes and not only the "sticks"...)

Left side: the mud-flaps, which were quite tricky to made, as the plain photo-etched sheet metal had to be curved into a 3D-shape. Here you can see the single steps. Then: pedalry, dashboard and steering wheel.
The body, already painted with a light gray shade:

Wheels and fenders are going to be painted in a dark red, but I'm still busy mixing the right shade...
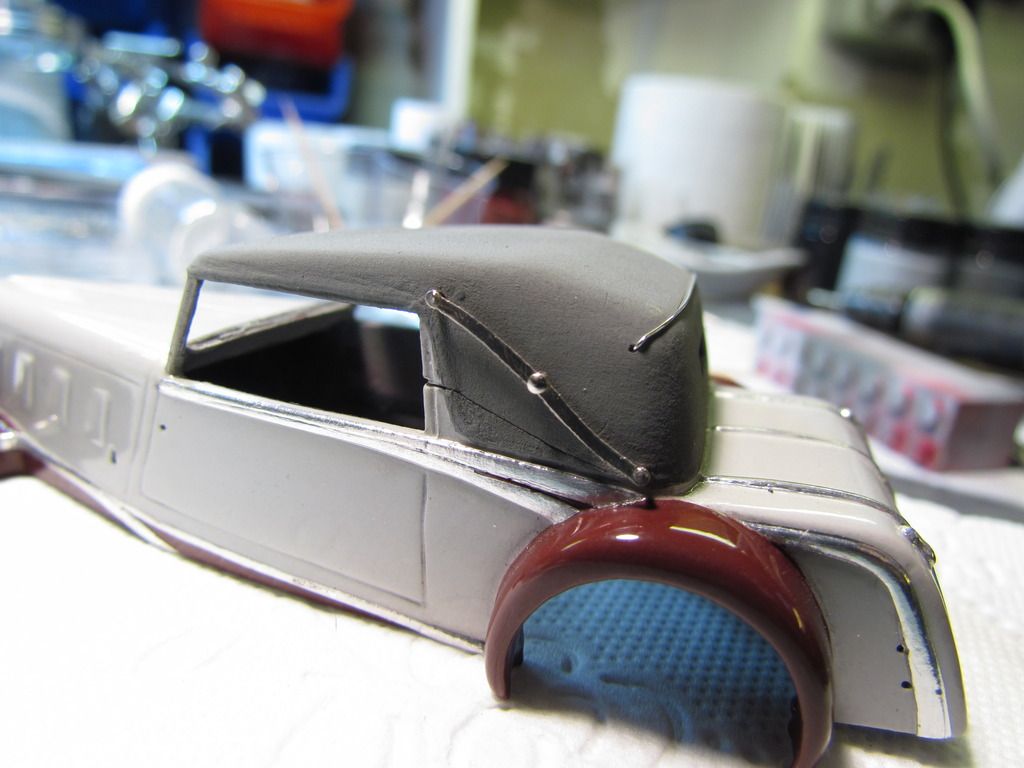
Many duties keep me away from model building... But slowly I'm going on... For today I masked the bodywork and airbrushed the fenders and the beltlines in a dark wine-red, as well as all tiny parts for the wheels:


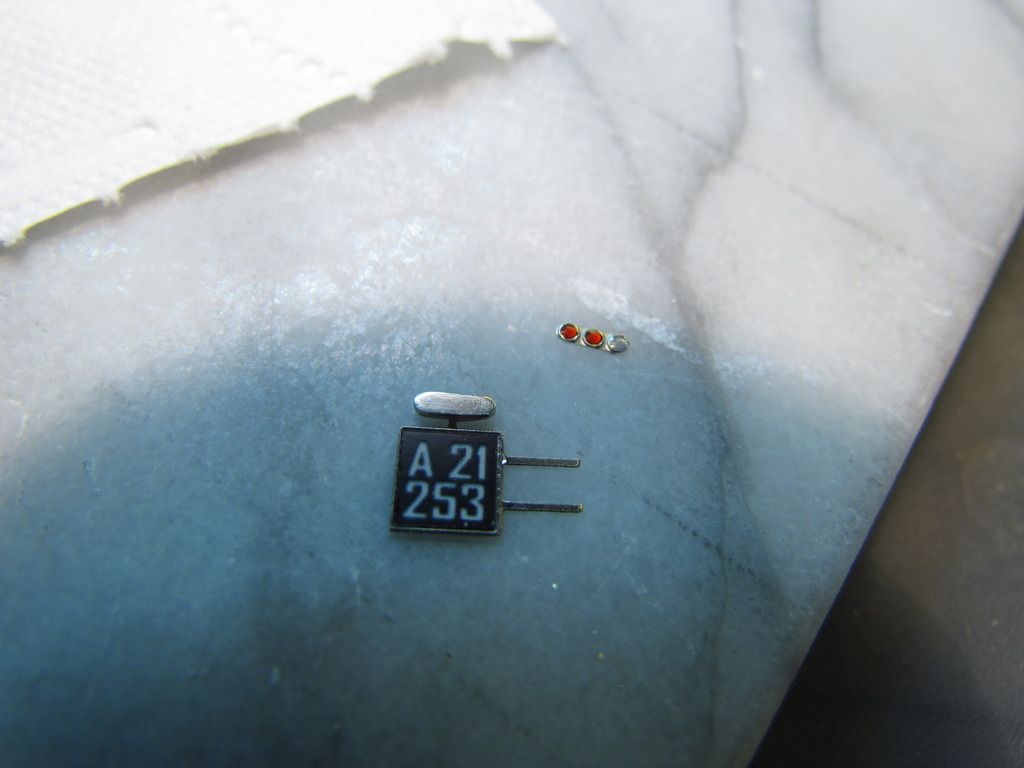
The headlights were milled out and will get real lenses:

The same for the searching light:

 (Blue tack helps holding the small round part tight for milling)

... and for the marker lights, which already got a dot of clear resin:

But slowly I'm going on... For today I masked the bodywork and airbrushed the fenders and the beltlines in a dark wine-red, as well as all tiny parts for the wheels:

The headlights were milled out and will get real lenses:

The same for the searching light:

 (Blue tack helps holding the small round part tight for milling)
... and for the marker lights, which already got a dot of clear resin:

The colour scheme is now ready. This time I try matte enamel lacquer which is to be covered with clear gloss lacquer, because matte paint can be airbrushed easier in narrow spaces like behind the front fenders  . On the other hand the quite rough surface is difficult to smoothen for a top clear finish... :? The next days we will see the result...
 (The belt and decorative lines will be covered with Bare Metal Foil later.)
The chassis is completed now, the wheels already show the finished dark red shade (looks more brownish on the photos, but more red/violet in real life):

 . On the other hand the quite rough surface is difficult to smoothen for a top clear finish... :? The next days we will see the result...
 (The belt and decorative lines will be covered with Bare Metal Foil later.)
The chassis is completed now, the wheels already show the finished dark red shade (looks more brownish on the photos, but more red/violet in real life):

First layer of clear lacquer and first BMF lines:


Perhaps a violet roof wouldn't be that bad... ?


Perhaps a violet roof wouldn't be that bad... ?

BMF is completed, and a final (hopefully) layer of clear lacquer has been applied, which still has to be polished:


To avoid further comparison with chocolate, I will take all future photos with blueish LED-lights  Now we can see how everything will turn out:


 Now we can see how everything will turn out:

Just a tiny detail for today: The spare wheels. Nevertheless it cost a lot consideration how these should look like, as there is only one single photo of the original car, showing it from a front angle. Futhermore there was no separation between tyre and cover, so that I had to scribe a line into the parts. However, that's what it turned out:


And - as always - it is a pity, how merciless a digital camera can be... In reality it looks much finer...


And - as always - it is a pity, how merciless a digital camera can be...
In reality it looks much finer... Making the interior door panels:
Photo-etched panels, backing will make a thin metal edge.

New method of making window lifters (yet not satisfied... :? )
Outside colour scheme completed, now waiting for detailing:


Photo-etched panels, backing will make a thin metal edge.

New method of making window lifters (yet not satisfied... :? )
Outside colour scheme completed, now waiting for detailing:


Well, now the roof does look like I planned it. But first the colour was too thick and I had to remove it (while saving the painting of the bodywork :evil: ), then the grey paint had shades and I couldn't determine the reason...
For today, I fixed the storm rods to the roof. First I made them in one piece, but as I had to photo-etch another time anyway, I tried to make them separated and - it works:

And here's my recent solution of making a dashboard as fine and elegant as possible:


For today, I fixed the storm rods to the roof. First I made them in one piece, but as I had to photo-etch another time anyway, I tried to make them separated and - it works:


And here's my recent solution of making a dashboard as fine and elegant as possible:


The steering wheel with its column, as always turnable :

And the windshield. Please obey the two holes in the lower edge, there the wipers will be sticked through and attached to the dashboard. I wouldn't have thought that you can drill 0.5mm holes into 0.15mm glass :
:

:
And the windshield. Please obey the two holes in the lower edge, there the wipers will be sticked through and attached to the dashboard. I wouldn't have thought that you can drill 0.5mm holes into 0.15mm glass
 :
:
Difficult to see, but now the dashboard is fixed and the small holes on the top edge match the holes in the windshield:

Sorry for the blurry photo, just to give an impression of the wipers, attached to arms made of silver wire:

And these completed wipers sticked through the holes in the windshield and the dashboard, fixed from the back:

Completed with a horizontal rod:


Sorry for the blurry photo, just to give an impression of the wipers, attached to arms made of silver wire:

And these completed wipers sticked through the holes in the windshield and the dashboard, fixed from the back:

Completed with a horizontal rod:

"Wedding" of chassis and body took place and driver's side is completed with all the tinsel:


Good news, dear friends: The Austro Daimler is ready! But before I'll present the final car with photos, I have to bore you with some details:
Rear licence plate with photo-etched lights, filled with resin:

Making lenses for headlights: Designing a pattern on PC, photo-etching, taking a silicone mould and filling this up with clear resin. This way you can design any lenses in any size required. Placed onto the milled-out headlights, equipped with rhinestones (does anybody still know Siku models? ):


And a first sneak preview:


So please give me a couple of days to relax and to take photos, I'll be back soon!
Rear licence plate with photo-etched lights, filled with resin:


Making lenses for headlights: Designing a pattern on PC, photo-etching, taking a silicone mould and filling this up with clear resin. This way you can design any lenses in any size required. Placed onto the milled-out headlights, equipped with rhinestones (does anybody still know Siku models?
):


And a first sneak preview:


So please give me a couple of days to relax and to take photos, I'll be back soon!

The time has come, dear friends, so lay back and enjoy:


And now the "Bergmeister" in his natural environment:


That's all for the moment, I hope you enjoyed this thread and wish to thank you all for your participation! - And don't forget,
Jean B. will return - in "Flying Star"
...soon in this theatre!


And now the "Bergmeister" in his natural environment:


That's all for the moment, I hope you enjoyed this thread and wish to thank you all for your participation! - And don't forget,
Jean B. will return - in "Flying Star"
...soon in this theatre!